When we say “authoring” we mean the process of adding content to a Quarto document—literally, the things you write in a .qmd file. More specifically, this chapter focuses on what you put in the parts of your document that are interpreted as markdown—that is, everything that isn’t the document header, or an executable code cell.
Our goal is to give you a good overview of breadth of Quarto’s authoring features, while delaying many of the details to later chapters of the book. We also focus on syntax that is broadly supported across multiple output formats and cover specific format features where relevant in Chapter 9, Chapter 10 and Chapter 11.
We suggest reading through the chapter in its entirety on your first reading, and then referring back to specific sections as needed when authoring your own documents.
12.1 Markdown text
Everything that isn’t the document header or an executable code cell is interpreted as Quarto markdown. Quarto markdown inherits much of Pandoc’s markdown syntax, but uses its own parser. This means you can use familiar markdown syntax, though there are some differences from Pandoc. The rest of this chapter outlines the most useful Quarto markdown syntax.
While we distinguish between executable code cells and markdown in the source document, this distinction disappears after rendering. When cells execute, their output becomes markdown and is treated identically to other markdown content. Executable code cells produce block-level markdown, so you can only use them where block elements are allowed. For example, as list items, inside fenced divs, or inside table cells. You cannot use code cells inline with text or inside section headings.
12.2 Sections
Use markdown headings to structure your document into sections and subsections. Markdown headings are created by prefixing text with one or more # characters, followed by a space, and the heading title:
## Section

### Subsection

#### Subsubsection
Quarto supports six levels of headings, from level-1 (#) to level-6 (######). The value of title in the document header usually becomes the level-1 heading of the document, which is why sections usually start with level-2 headings.
You can attach attributes to headings by adding curly braces {} after the heading text. For example, you might add an identifier to a section heading to enable cross-referencing:
## Section Title {#sec-section-title}Or you might add a class like .unlisted to exclude a section from the table of contents:
## Section Title {#sec-section-title .unlisted}Attributes are a way to add metadata to markdown elements, usually inside curly braces {} after the element. Attributes are used extensively in Quarto to control the behavior or appearance of many elements.
The types of thing you can add as attributes include:
- Identifiers (IDs), should be unique and start with
# - Classes start with
. - Key-value pairs use
key='value'syntax.
The order of attributes matters: identifiers must come first, followed by classes, and then key-value pairs.
12.3 Paragraphs
Create paragraphs by separating text with blank lines:
This is the first paragraph. It can span multiple lines
in your source document.

This is a second paragraph, separated by a blank line.
Quarto ignores line breaks within a paragraph, which means you can wrap your text across multiple lines without affecting the final rendered output.
12.4 Text
Beyond plain text, Table 12.1 summarizes the most common things you want to put inside a paragraph or heading: formatted text, links, cross-references, citations, math and footnotes.
These elements are called inline text elements, because they are used inline with text, inside what are called block elements like paragraphs and headings. You can also use them inside many of the other block-level elements discussed in this chapter like as list items, inside tables, and inside callouts.
| Element | Output | Markdown Syntax |
|---|---|---|
| Text formatting | italics, bold, bold italics | |
| superscript2 / subscript2 | |
|
|
||
verbatim code |
|
|
| smallcaps | |
|
| underlined | |
|
| highlighted | |
|
| Links | https://quarto.org | |
| Quarto | |
|
| Links section | |
|
| Math Section 12.9 | Inline math: \(E = mc^{2}\) | |
| Cross-references See Section 12.10 | Figure 12.4 | |
| Chapter 12 | |
|
| Citations Section 12.11 | Knuth (1984) shows … | |
| … (Knuth 1984) | |
|
| (Knuth 1984; Wickham et al. 2023) | |
|
| Footnotes Section 12.12 | An inline note.1 | |
12.5 Lists
You can create an unordered list by starting each line with - (or * or +) followed by a space, ensuring there is a blank line before the first element:
My list:

- First item
- Second item
- Third item
Leaving no blank lines between items will result in a compact list, while leaving a blank line between items will create a loose list with more vertical spacing.
Use numbers followed by a period to create an ordered list:
My numbered list:

1. First item
2. Second item
3. Third item
The actual numbers you use doesn’t matter—Quarto will renumber the list automatically. You could use 1. for every item if you prefer.
List items can contain other block elements like paragraphs, code blocks, or even other lists. Subsequent elements should be indented to line up with the first non-space content after the list marker. Figure 12.1 shows an example of a nested list, along with its rendered output.
- First item with multiple paragraphs.

  This is the second paragraph,
  indented to align with the first paragraph.

- An item with a sublist:

  1. Subitem one
  2. Subitem two

- Third item

  ```{.python}
  # This is a code block inside a list item
  ```
First item with multiple paragraphs.
This is the second paragraph, indented to align with the first paragraph.
An item with a sublist:
- Subitem one
- Subitem two
Third item
# This is a code block inside a list item
Quarto also supports task lists and definition lists. See the Quarto documentation for details on these specialized list types.
12.6 Code blocks
We use the term code blocks, as distinct from code cells, for code that is to be shown, but never executed.
There are two equivalent syntaxes for code blocks. You can use triple backticks followed by the language name:
```sql
SELECT * FROM table;
```
Or use triple backticks followed by curly braces with the language name prefaced by a period:
```{.sql}
SELECT * FROM table;
```
We prefer the second syntax since it’s easier to add additional code block attributes. For example, you might add filename which adds a header with the filename above the code block as shown in Figure 12.2.
```{.sql filename="query.sql"}
SELECT * FROM table;
```
query.sql
SELECT * FROM table;The language for code blocks is used only for syntax highlighting. You can see a list of supported languages by running the following command in your terminal:
Terminal
quarto pandoc --list-highlight-style Specifying a language that isn’t supported will simply result in no syntax highlighting being applied.
12.7 Tables
The simplest way to add a table to a Quarto document is to create a markdown pipe table, however cells in a markdown pipe table cannot contain block content like multiple paragraphs, code cells, or lists. To have cells with complicated cell contents, you can use an alternative syntax called list tables. You can also use HTML table syntax, regardless of your target format, to create tables in Quarto documents. You won’t usually write HTML syntax by hand, but it is a common output from computational packages that create tables.
Tables are so important in Quarto documents that we dedicate an entire part of this book to them. For more details, see ?sec-figtab.
12.7.1 Markdown pipe tables
The simplest syntax for a table in Quarto markdown is known as the pipe table, named because columns are separated by the pipe (|) character. A pipe table consists of column headers, a separator row of dashes (-) and pipes (|), and data rows with pipe-separated cells.
Figure 12.3 gives an example of a pipe table, along with its rendered output. The line after the table, starting with :, is optional, and specifies the caption and any attributes for the table (inside curly braces {}). For example, the table is given the ID #tbl-perf so it is numbered and can be cross-referenced.
| Algorithm           | Accuracy | Time  |
|---------------------|----------|-------|
| Random Forest       | 96.7%    | 0.12s |
| Logistic Regression | 81.2%    | 0.08s |
| Linear Regression   | 74.8%    | 0.05s |

: Training performance {#tbl-perf}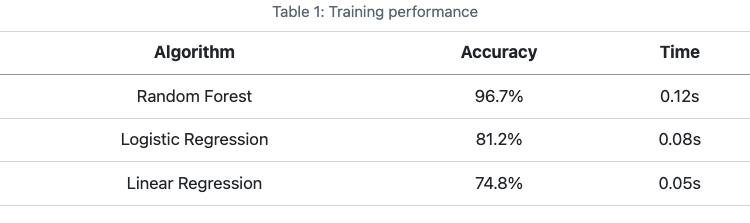
12.7.2 List tables
TODO: Revisit this once the list-tables extension is bundled with Quarto. Specifically, where does the caption go.
List tables use markdown list syntax to create tables where cells can contain multiple paragraphs, code cells, or lists. List tables need to be wrapped in a fenced div with the class list-table. Inside the div, each row is represented as list item, with each cell as an subitem.
For example, to create the same table content as Figure 12.3 using a list table, you would include the following in your document:
::: {#tbl-perf .list-table}
Training performance

* - Algorithm
  - Accuracy
  - Time
* - Random Forest
  - 96.7%
  - 0.12s
* - Logistic Regression
  - 81.2%
  - 0.08s
* - Linear Regression
  - 74.8%
  - 0.05s
:::
To include more complicated content in cells, like code blocks or formulas, include them as you would in normal markdown, but maintain indentation for the list structure, and the required white space for the content type:
::: {.list-table}
* - Code
  - Model for the mean
* -

    ```r
    summary(lm(mpg ~ wt + cyl, data = mtcars))
    ```

  -
    $$
    \beta_0 + \beta_1 \text{wt} + \beta_2 \text{cyl}
    $$
:::
12.7.3 HTML tables
You can also use HTML to create tables in Quarto documents, regardless of your target format. You typically won’t write HTML tables by hand—instead, you’ll generate them with code cells or import them from other tools.
As an example, to generate the same table as Figure 12.3 with HTML, you could include the following in your document:
```{=html}
<table id="tbl-perf">
  <caption>Training performance</caption>
  <thead>
    <tr>
      <th>Algorithm</th>
      <th>Accuracy</th>
      <th>Time</th>
    </tr>
  </thead>
  <tbody>
    <tr>
      <td>Random Forest</td>
      <td>96.7%</td>
      <td>0.12s</td>
    </tr>
    <tr>
      <td>Logistic Regression</td>
      <td>81.2%</td>
      <td>0.08s</td>
    </tr>
    <tr>
      <td>Linear Regression</td>
      <td>74.8%</td>
      <td>0.05s</td>
    </tr>
  </tbody>
</table>
```
12.7.4 From a code cell
When the output from an executable code cell is a markdown or HTML table, it will be included in your Quarto document.
To add an identifier and caption to the table use the code cell options label and tbl-cap respectively:
```{LANGUAGE}
#| label: tbl-example
#| tbl-cap: "Caption"

# Code that generates a markdown or HTML table
```
12.8 Images and figures
You can include images in your document either from an image file, or from the output of an executable code cell.
Figures are so important in Quarto documents that we dedicate an entire part of this book to them. For more details, see ?sec-figtab.
We use the term figure to refer to any image, numbered or not, included in a document. You may be more used to using the term figure to refer to an image with a numbered caption—we’ll call this a cross-referenceable figure.
12.8.1 From a file
To include an image file in markdown you use the following syntax:
Where the path to the image is a path relative to the current document.
If you preface the path with /, it is interpreted as a path relative to the project root. You’ll learn more about project structure in Projects.
You can add a caption inside the square brackets, an identifier inside curly braces after the image path, and alternative text for accessibility in a fig-alt attribute:
{#fig-quarto fig-alt="Alternative text"}If your identifier starts with fig-, the image will be a cross-referenceable figure, numbered, and can be referenced using the @ syntax.
12.8.2 From a code cell
If the output from an executable code cell is an image, it will be automatically included in your document. To add an identifier, caption, or alternative text use the code cell options label, fig-cap, and fig-alt respectively:
```{LANGUAGE}
#| label: fig-quarto
#| fig-cap: "Caption"
#| fig-alt: "Alternative text"

# Code that generates a plot
```
12.9 Mathematical equations
You can include formulas and equations in your document using TeX math syntax. TeX math is the notation originally developed for the TeX typesetting system. It’s now the de facto standard across technical writing tools — Wikipedia, scientific journals, Jupyter notebooks, and nearly every markdown processor understand it. If you’re new to TeX math, the LaTeX Wikibook’s Mathematics chapter is a gentle tutorial. Not all TeX math constructs are supported, but most of the common ones are. The best way to know whether a particular construct is supported is to render and see.
There are two ways to include math: inline math, using single $, appears within a line of text; while display math, using $$ appears centered on its own line. Table 12.2 shows examples of both.
To number and cross-reference a display equation, add an identifier starting with eq-, see Section 12.10 for more details.
| Element | Output | Markdown Syntax |
|---|---|---|
| Inline math | … \(E = mc^{2}\) … | |
| Display math | The formula is: \[ E = mc^{2} \] | |
12.9.1 Theorems and proofs
To get special styling for theorems, proofs, and related blocks, wrap the block in a fenced div with an identifier that uses the appropriate prefix, see Table 12.3. The block is numbered automatically and can be cross-referenced with @:
::: {#thm-pyth}
## Pythagorean Theorem
For a right triangle with legs $a$ and $b$ and hypotenuse $c$:
$$a^2 + b^2 = c^2$$
:::

The Pythagorean theorem (@thm-pyth) is fundamental to Euclidean geometry.
Table 12.3 lists the available prefixes and the block they produce.
| Prefix | Block |
|---|---|
thm- |
Theorem |
lem- |
Lemma |
cor- |
Corollary |
prp- |
Proposition |
cnj- |
Conjecture |
alg- |
Algorithm |
def- |
Definition |
exm- |
Example |
exr- |
Exercise |
prf- |
Proof (format: typst and format: html only) |
rem- |
Remark |
sol- |
Solution |
The prf- prefix isn’t supported under format: pdf (LaTeX). For a cross-format proof, use the class form instead:
::: {.proof}
Apply Markov's inequality to $(X - \mu)^2$.
:::
The result is an unnumbered, non-cross-referenceable proof block. Similarly, .remark and .solution classes are available for unnumbered forms of #rem and #sol.
12.10 Cross-references
Cross-references are automatically generated links to elements within your document, like figures, tables, sections, and equations. When you render your document, Quarto automatically numbers these elements and creates the links.
To create a cross-reference you need to do two things:
Add an identifier to the element you want to reference using an identifier that starts with a specific prefix.
Reference the element elsewhere in your document using
@followed by the identifier.
Table 12.4 give examples of common elements, their prefixes and an example of adding the identifier as an attribute. For computational outputs, like figures and tables generated from code cells, you add the identifier using the label code cell option. You can see an example for a table in Section 12.7.4, a figure in Section 12.8.2, and many more details in ?sec-figtab-crossrefs.
| Element Type | Prefix | Markdown |
|---|---|---|
| Figure | fig- |
|
| Table | tbl- |
|
| Section | sec- |
|
| Equation | eq- |
|
| Code listing | lst- |
|
| Theorem | thm-, see Quarto docs for other theorem-like environments |
|
| Callouts | nte-, tip-, wrn-, imp-, cau- |
|
Once labeled, you can cross-reference an element using the @ syntax. Table 12.5 gives examples of this syntax.
| Description | Output | Markdown syntax |
|---|---|---|
| Basic reference | Figure 12.4 | @fig-elephant |
| Custom prefix | Fig 12.4 | [Fig @fig-elephant] |
| Number only | 12.4 | [-@fig-elephant] |
| Multiple references | Figure 12.4, Figure 12.5 | [@fig-elephant; @fig-panther] |
For more details on cross-referencing specific element types, see the Quarto documentation.


Some placeholder images for cross-referencing examples
12.11 Citations
You can automatically generate citations and a bibliography in a number of styles. To do so you need:
A bibliographic data source, for example a BibLaTeX (
.bib) or BibTeX (.bibtex) file.A quarto document formatted with citations (see Citation Markdown).
Add a bibliography file to your document using the bibliography YAML metadata field. For example:
---
title: "My Document"
bibliography: references.bib
---
See Tip 12.2 for an example references.bib file. Then you can cite references from the bibliography file using their identifiers and the citation syntax described in Table 12.6.
When you render your document, Quarto will automatically generate a bibliography at the end of your document with all cited references (Figure 12.6).
| Markdown Syntax | Output |
|---|---|
|
Knuth (1984) shows … |
|
… (Knuth 1984) |
|
As Knuth (1984) shows … |
|
(Knuth 1984; Wickham et al. 2023) |
References
The appearance of the citations both inline and in the bibliography depends on the citation style as defined in a CSL file. By default, Quarto uses the Chicago Manual of Style author-date format, but you can provide a custom CSL file using the csl option field in your document header, for example:
---
title: "My Document"
bibliography: references.bib
csl: nature.csl
---references.bib?
A .bib file is a plain text file that contains bibliographic entries in a specific format:
references.bib
@article{knuth1984,
  title={Literate programming},
  author={Knuth, Donald E.},
  journal={The Computer Journal},
  volume={27},
  number={2},
  pages={97--111},
  year={1984},
  publisher={British Computer Society}
}

@book{wickham2023,
  title={R for Data Science: Import, Tidy, Transform, Visualize, and Model Data},
  author={Wickham, Hadley and {\c{C}}etinkaya-Rundel, Mine and Grolemund, Garrett},
  year={2023},
  edition={2nd},
  publisher={O'Reilly Media},
  url={https://r4ds.hadley.nz/}
}
You can manage this file by hand, but usually you’ll use something to manage it for you. You could have a reference management tool of choice export to .bib. Or, in the visual editor, you can use the “Add Citation” button in the toolbar.
When using format: typst, by default citation processing is handled directly by Typst. See Chapter 10 for more details.
12.12 Footnotes
The simplest syntax for footnotes uses a carat (^) followed by the footnote contents:
Here some text that needs a footnote.^[Here is the footnote contents.]However, for longer footnotes, or footnotes with multiple paragraphs, specify a footnote identifier and define the footnote contents elsewhere in the document, as shown in Figure 12.7.
Here is some text that needs a long footnote.[^longnote]

[^longnote]: Here's the footnote contents with multiple blocks.

    Subsequent paragraphs are indented to show that they
belong to the previous footnote.

    ```{.r}
    # Some code
    ```

This paragraph won't be part of the note, because it
isn't indented.
Here is some text that needs a long footnote.2
This paragraph won’t be part of the note, because it isn’t indented.
12.13 Fenced divs
Fenced divs are a component that Quarto uses extensively to create block-level regions of content with specific behaviors or styles. For example:
- callout blocks (Section 12.14) are specified as a fenced divs with a special class attribute,
- a two column panel layout (Section 12.15) is specified using a fenced div with a key-value attribute, and
- you can make an element cross-referenceable with an identifier attribute that starts with a special prefix.
The term div originates from the <div> tag in HTML, where it is used to define a division or region in a document. The term fenced div comes from Pandoc markdown, and describes the specific markdown syntax used to create a div with a fence of colons (:::).
Fenced divs provide a way to create <div> elements when rendering to HTML. But, more importantly, fenced divs are easily intercepted by Quarto. The result is that many Quarto features use the fenced div syntax to define a region of content that needs special handling. Quarto recognizes these divs, processes them, and inserts suitable markup depending on the target format.
A fenced div begins with at least three consecutive colons followed by possibly empty curly braces with attributes. The div ends with another line of at least three consecutive colons. The div should be separated by blank lines from the blocks before and after it. For example, here’s a fenced div with no attributes:
::: {}
This content is inside a div with no attributes
:::
The attributes may include an identifier (starting with #), one or more classes (starting with .), and key-value pairs (key='value'):
::: {#id .class1 .class2 key='value'}
This content is inside a div with an identifier, two classes, and a key-value attribute
:::
You can also nest fenced divs inside one another:
::::: {#id .class1 .class2 key='value'}

::: {}
Content inside the nested div
:::

More content inside the top-level div
:::::
The number of colons used to open and close a fenced div do not need to match, but it can be useful to match them for readability.
When the only attribute of a fenced div is a single class, it can be written using a shorthand syntax that omits the curly braces, and the . on the class name:
::: class-name
Contents of the div.
:::
12.14 Callouts
Callouts are special fenced divs with one of the callout classes: .callout-note, .callout-tip, .callout-warning, .callout-caution, or .callout-important. They are typeset across formats to set their contents apart from the main document text, see Figure 12.8.
:::{.callout-note}
## Types of callout

There are five types of callouts, including:
`note`, `tip`, `warning`, `caution`, and `important`.
:::There are five types of callouts, including: note, tip, warning, caution, and important.
Additional key-value attributes can be added to callouts to customize their behavior:
| Key | Values |
|---|---|
appearance |
|
collapse |
|
icon |
|
See more examples in the Quarto documentation.
12.15 Layout
Fenced divs (Section 12.13) are also used to lay out content on the page. There are two common ways to control layout:
Panel layouts arrange content in rows and columns using
layout-*attributes, useful when you want elements to be side by side, or arranged in a grid.Column classes arrange content across different widths of the page, useful when you need to give content more horizontal space, or put elements in the margin.
12.15.1 Panel layouts
Use a fenced div with the layout-ncol key-value attribute to arrange content in multiple columns. It’s best to be explicit about what each item is by nesting them each in their own fenced div.
For example, to place two items side by side in two columns, set layout-ncol="2" and nest each item in its own fenced div, as shown in Figure 12.9.
::::: {layout-ncol="2"}
::: {}
Content for the first column.
:::

::: {}
Content for the second column
:::
:::::
Content for the first column.
Content for the second column
The content inside each item can be any block content, including paragraphs, lists, code cells, images, or tables. Further items will fill into new rows and Quarto will allocate vertical space as needed. In HTML formats, the layout is responsive so that on smaller screens the items will stack vertically.
Use the layout-nrow attribute if you’d prefer to specify the grid by the number of rows, or for more complicated layouts use the layout attribute. You can see more examples using figures and tables as content in ?sec-figtab-layout.
12.15.2 Column classes
For format: html and format: pdf, the page is divided into a body content area and a right margin. By default, your content will be placed in the body area. You can override this by putting content in a fenced div and adding special column classes.
For example, to place content in the right margin use the .column-margin class:
::: {.column-margin}
This content will appear in the right margin.
:::
This content will appear in the right margin.
Use the .column-page-right class to expand content into the margin to give it more horizontal space:
::: {.column-page-right}
This content will expand into the right margin.
:::
This content will expand into the right margin.
Additional classes are available to provide more horizontal whitespace, and for format: html columns that expand to the left, and to the full screen width. See the Quarto documentation for the full list of classes.
You can also see more examples with figures and tables, including computational outputs in ?sec-figtab-layout.
12.16 Raw blocks
Occasionally, you may need to directly add format specific syntax to your document. Raw blocks provide a way to do this that protects their contents from being processed by Quarto, and omits them from formats where they aren’t relevant.
A raw block begins with triple backticks followed by curly braces containing an equals sign (=) and the format name. For example, you might use a raw block to add an iframe to an HTML document:
```{=html}
<iframe src="https://example.com" width="600" height="400"></iframe>
```
You’ll see more examples of raw blocks in Chapter 9 and Chapter 10.
12.17 Shortcodes
Shortcodes are special commands that are replaced with specific content when the document is rendered. The shortcode syntax uses double curly braces and angle brackets: {{< shortcode-name >}}. The shortcode name can by followed by additional arguments or key-value pairs.
As an example, the meta shortcode inserts values from the document metadata into your document. Figure 12.12 illustrates how you might use it to extract text you commonly replace, into a document option you set in your header.
---
client: "ACME Corp"
---

**Client:** {{< meta client >}}
Client: ACME Corp
meta shortcode
You can find a list of built-in shortcodes in the Quarto documentation. You can also add shortcodes via extensions (Section 17.3).
12.18 Includes
The include shortcode lets you insert the contents of another file directly into your document. This is useful when you want to reuse content across multiple documents or break a large document into smaller, more manageable files.
The basic syntax is:
{{< include _content.qmd >}}Where _content.qmd is the path to the file you want to include, relative to the current document. Files that contain content to include should be prefixed with an underscore (_) to ensure they are rendered on their own.
If you preface the path with /, it is interpreted as a path relative to the project root. You’ll learn more about project structure in Chapter 13.
12.19 Other features
- Diagrams: create diagrams directly in your markdown using Mermaid or Graphviz syntax—see the Quarto diagrams documentation for details.
12.20 Wrapping up
This chapter has focused on how to write a rich document using Quarto markdown. You’ve learned to use markdown headings to structure your document into sections, create paragraphs and lists, and format text with emphasis, links, and other inline elements. You’ve covered how to add the most important components of technical and scientific writing: code, tables, images, and equations.
You’ve also learned how to use key Quarto features like cross-references, citations, footnotes, and callouts. Fenced divs let you create special regions like callouts or multi-column layouts, while shortcodes and includes help you reuse content efficiently. We’ve focused on syntax that works across multiple output formats, leaving format-specific details for later chapters—you’ll likely want to return to specific sections as reference when authoring your own documents.